One of the biggest trends in home décor right now are photo walls. When creating a photo wall gallery there really is no right or wrong way. It’s what looks best with the type of space you have, the size of your wall and whether you will add to your photo wall over time.
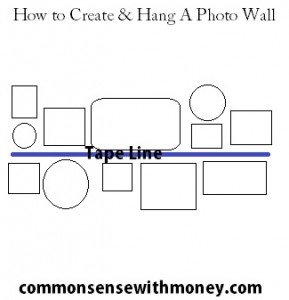
The easiest way to create a photo wall is to use a piece of painters tape and create the desired line you are looking for. Place the line of tape onto your wall before starting your photo wall. For instance, if you want a unified look you will want to go off a straight horizontal line. When hanging your picture frames place the top or bottom of every frame on this line.
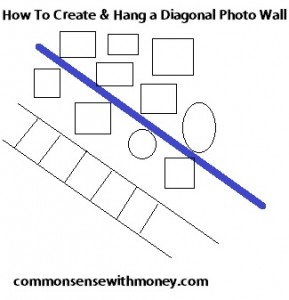
Now hanging photos along stairs or along a diagonal line can be a bit tricky. Again, using painters tape place a diagonal line that is parallel with the stairs on your wall. You’ll want to place the corner of the picture frames along the edge of the tape line.
Now let’s hang those beautiful photos on your wall. There’s two easy ways to create your photo wall. You can decide which option works best for you.
Wax Paper
Tools needed:
- Wax Paper
- Hammer
- Nails
- Sharpie Marker
- Lay out picture frames on the floor. Play with the lay out until you get the design that you like.
- Flip picture frames over so the back is facing up, keeping the layout.
- Spread out wax paper taping longer pieces together if need be to create one unified piece of paper.
- Using a Sharpie, mark where each nail hole(s) need to go on the wax paper.
- Carefully tape the wax paper to your wall.
- Using a hammer, place all your nails using the markings.
- Remove the wax paper and place each picture frame on the wall
Trace Frames
Tools Needed:
- Paper
- Pencil
- Hammer
- Nails
- Gather the picture frames you’d like to hang on your photo wall.
- Trace each picture frame with the back up, marking where you nail hole(s) will need to be placed.
- Once you’ve traced your picture frames, hang each paper on the wall with tape.
- Move your layout until you get the desired look on your wall.
- Using a hammer and a single nail, make your hang mark on each photo framed that you have hanging on the wall.
- Remove the paper picture frame you’ve traced and move onto the next frame.
- Go back and place nails into the holes that you’ve made and hang the desired picture frames.
Now stand back and admire your work! Let us know which option is the easiest for you and how you’ve utilized these tips to hang your own photo wall by leaving a comment below.

