A DIY manicure can save you a ton of money over the course of a year! They can be time consuming and intimidating, though.
Here are a few tips to help you with your DIY manicure…
Soften Cuticles Overnight
If your cuticles and dry skin need some serious attention before your DIY manicure, rub them with a thick moisturizing lotion before bed and wear gloves. The moisturizer will soak in overnight and leave your hands and cuticles super soft come morning. This little tip also works for dry feet too!
Scrub Nails With Toothpaste
Are your nails stained from the previous nail polish you applied? Use a toothbrush or nailbrush and a whitening toothpaste to scrub your nails and buff away stains before your DIY manicure. You want to use the actual paste for this, since it works much better than the gel. Use a paste of baking soda and hydrogen peroxide to whiten yellow nails.
Swipe Nails With Vinegar
Before painting your nails, rub a cotton ball dipped in vinegar over your fingernails. This will help clean the nails and remove excess oils, which can make your DIY manicure last longer. You can also use nail polish remover for this step, but vinegar isn’t as harsh.
Use a Base Coat
Nail polish base coats serve a couple of very important purposes in your DIY manicure. First, it helps give the nail poish something to adhere to, which will help your DIY manicure last longer. It can also help prevent nail staining that can occur with some nail polishes, particularly dark colors.
Apply THIN Coats
One thick coat of nail polish may seem like the thing to do, but the thicker the coat, the longer it will take to dry. Even if a thick coat of nail polish feels dry to the touch on top, it could still be gummy underneath, resulting in dented and dinged nails. It’s better to apply two or three very thin coats of nail polish and let them dry completely in between coats.
Thin Out Thick Polish
If you’re nail polish is too thick, you can thin it out with a few drops of nail polish thinner. This can usually be found in the cosmetics section of most stores and is relatively inexpensive. Some people also use pure acetone to thin nail polish, but this can possibly break down and ruin the polish over time. Acetone can be used in a pinch, but only use it to thin nail polish that you don’t mind losing.
Create a Barrier
If you’re a messy nail polisher, like me, try creating a barrier over the skin around your fingernails. Swipe a thick coat of lip balm or a thin coat of petroleum jelly around your nails, which can make cleanup a lot easier! You can also use tape if you’re using particularly messy nail art techniques, like water marbling or gradients. Some people swear by painting plain glue around their nails and letting it dry before painting their nails. When you’re done, just peel off the glue and the stray nail polish marks!
Smooth Smudges Easily
Whenever I give myself a DIY manicure, I always end up with smudges, sine I’m super impatient! If the polish is still a little soft you can usually press and smoothed to smudged area with your tongue to fix it. You can also use a nail brush dipped in acetone to fix smudges in your DIY manicure.
Make a Self-Cleaning Nail Striper
If you have an empty or almost empty nail striper polish, you can make your own self-cleaning nail striper brush. Just empty any of the remaining polish and pour pure acetone into the bottle to clean it. It may take a few times of capping and shaking the acetone to get it completely clean. Then, fill it up with pure acetone. When you use the nail striper brush, just put the brush back in the bottle, close it, and give it a few shakes.
Try Some Nail Art
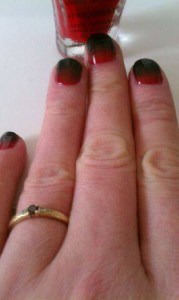
Nail art can be a fun and creative way to take your DIY manicure to a new level! Some techniques to try include stripes, polka dots, water marbling, gradients, and plastic wrap marbling. They may be a lot easier than you think! You don’t need any fancy equipment or tools, either. Chances are you probably already have some DIY nail art tools around the house!
Use Acrylic Paint
I love using acrylic paint for nail art! It’s so much easier to use than nail polish, and if you make a mistake, you can just wipe it off with a little water or alcohol. Make sure you apply a good top coat over your acrylic paint nail art, so it stays for the long haul.
Skip the Q-Tips
Most women reach for the Q-tips at the end of a DIY manicure to clean up. These are cliumsy and can leave annoying little cotton strands. Instead, use a small stiff flat nail or makeup brush dipped in acetone to clean up around the edge of the nail. It’s way more precise and give you a nice clean look.
Leave a comment below with some of your favorite DIY manicure tips!


